Help
Quick Start
Helper guide to using Spreeflo marketing automation platform.
Learn everything from setup to advanced features.
Quick Start Guide
Get up and running with Spreeflo in just a few minutes. This guide will walk you through the essential steps to create your first AI-powered email campaign.
Step 1: Account Setup
After signing up, you'll need to complete your account setup.
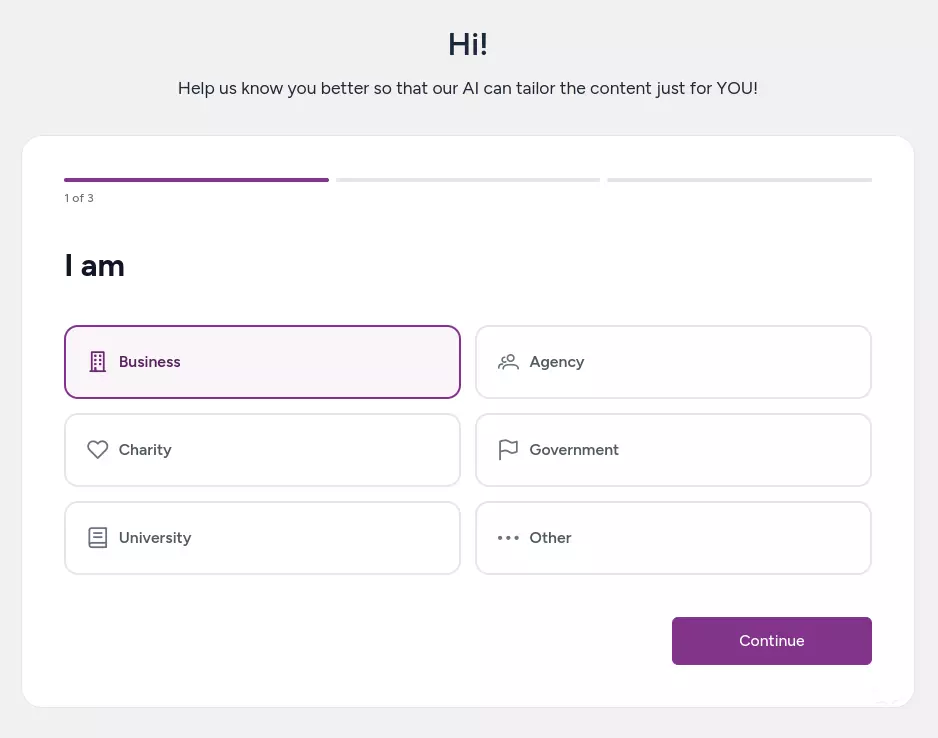
Complete the onboarding survey. This helps the AI understand your business, goals, and desired tone of voice for generating unique email copies for each contact. You may edit this later in Settings > AI Settings.
Start the 14-day free trial.
Step 2: Create Email Accounts
Set up your domain so you can send emails through Spreeflo. You need to do this before you can send any emails.
Emails sent from Spreeflo will appear as if they are coming from you.
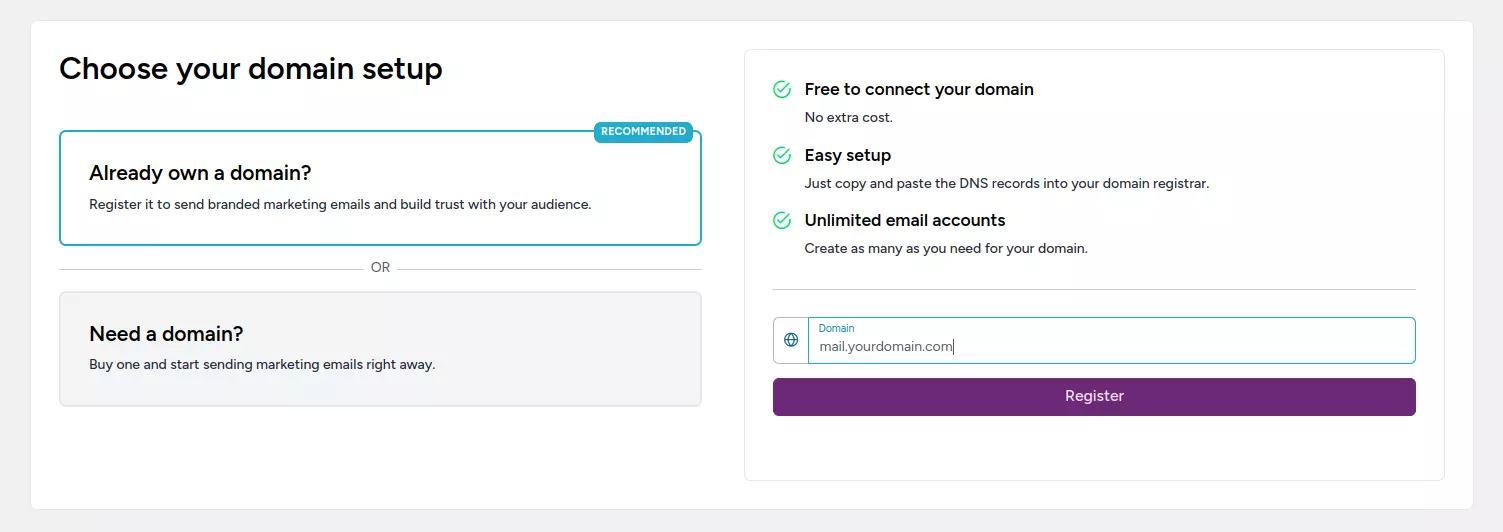
To set up your domain in Spreeflo, you need to add some MX, TXT and CNAME records to your domain's DNS settings so that we can verify that you own the domain you want to send emails from. These DNS records are also optimized to help you land in the inbox and not spam.
Follow our Set Up Your Domain guide for detailed instructions on how to set up your domain in Spreeflo.
It may take some time for you DNS records to be fully updated and take effect. You can check the status of your DNS records in the DNS Configuration modal (Email Accounts > your domain > DNS Configuration).
Once you've set up your domain records, you'll be able to create unlimited email accounts for your domain and start sending emails! Create an email account by clicking + Add Email Account and add an email account. We will use this newly created email to send a simple email to all your contacts.
Tip: Setting up all the DNS records provided by Spreeflo improves your email deliverability and builds trust with your customers.
Step 3: Import Your Contacts
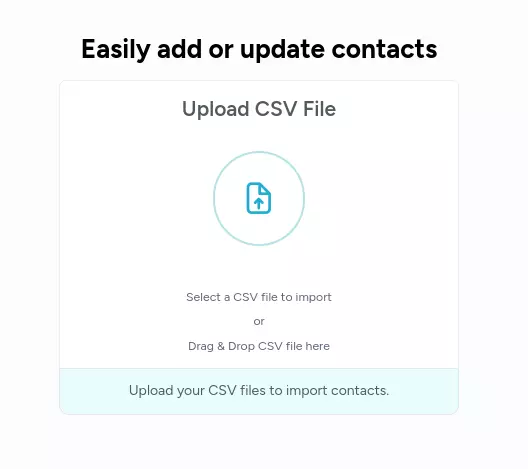
To send marketing emails to your contacts, you will need to import those contacts into Spreeflo. Go to Audience > Contacts.
If you have existing contacts, i.e. a database or audience on a different platform, you can get started by importing them via CSV.
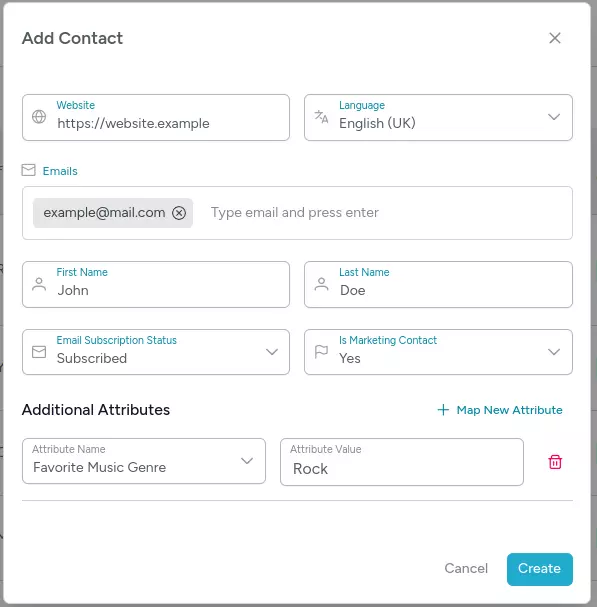
Otherwise, you may simply Add Single Contact to manually add a contact to your list to quicky get started.
You can import contacts to an audience via upload CSV, Spreeflo API, or manually adding them.
Follow our Import Contacts guide for detailed instructions on how to import contacts into Spreeflo.
Audiences
An audience is a list of contacts.
Most businesses will ever only need one audience. Then you use tags and segments to organize and target your contacts.
You may create multiple audiences but typically only marketing agencies would want to do so to make sure marketing campaigns for each audience never impact another audience.
Contacts
Contacts are unique users in your audience. We use email to uniquely distinguish contacts. The only required attribute for a contact is an email.
Contact attributes
Contact attributes are additional information you can associate with a contact. They can include things like name, location, job title, and more.
We provide default attributes like first name, last name, and website, but you can add up to 100 custom attributes to your contacts.
Tags
Tags are a way to categorize your contacts. You can create new tags at Audience > Tags.
A contact can be assigned multiple tags. Tag mulitple contacts in Audience > Contacts by selecting multiple contacts using the checkbox. Then click Tag selected button to open the tagging modal.
You may also use Spreeflo API to programmatically add or remove tags for your contacts.
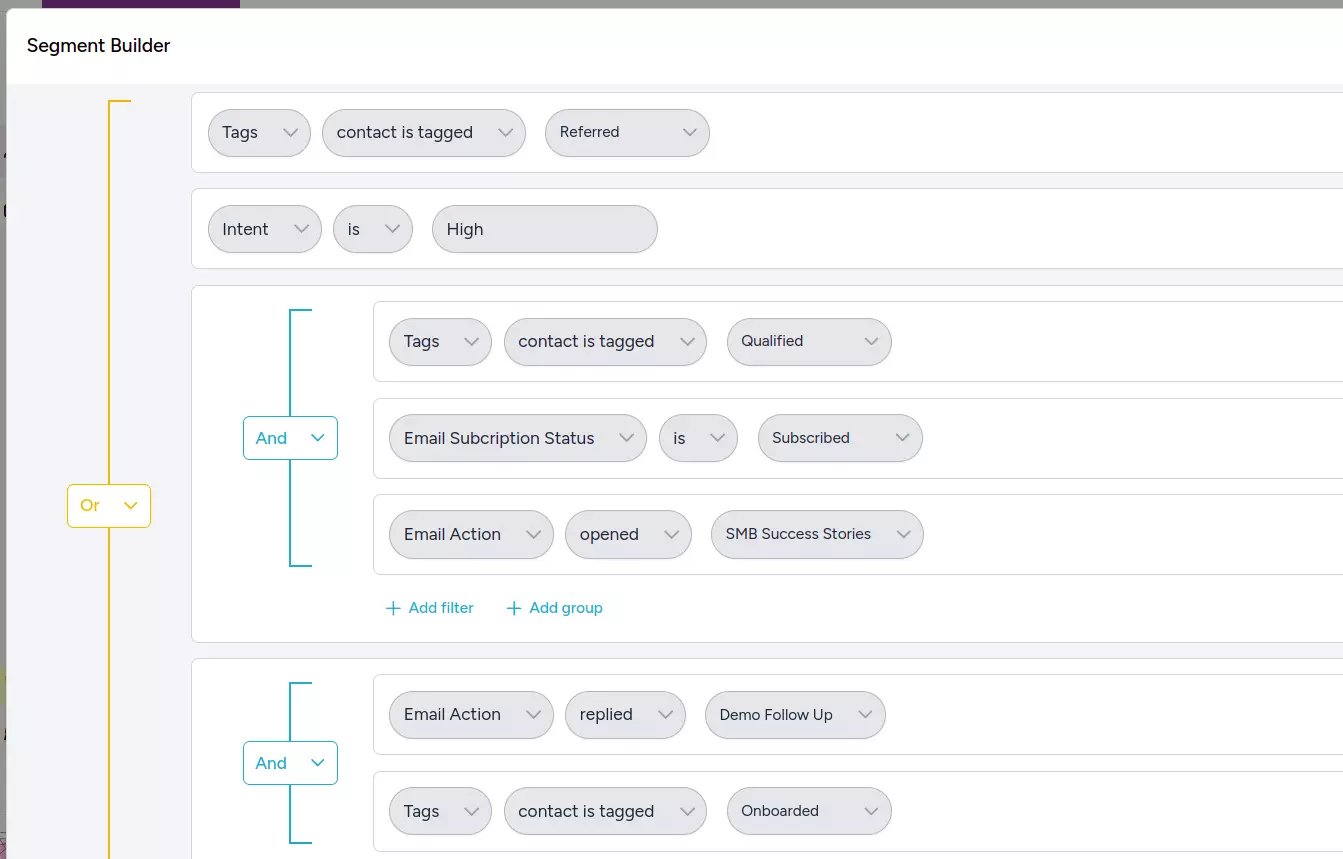
Segments
Segments are a way to group your contacts based on certain criteria. You can create new segments at Audience > Segments.
Use the Segment Builder to define criteria using contact attributes, tags and/or email activity to create groups of contacts. Contacts that meet the criteria will be added to the segment automatically and removed if they no longer meet the criteria.
Segments are a powerful way to target your contacts with precision for focused marketing campaigns.
Step 4: Create Your First Campaign
Spreeflo has 2 types of marketing automations:
- Campaigns: A campaign captures a fixed snapshot of contacts when it starts. It markets to only those contacts through to completion. Ideal when you want to market to everyone who currently matches specific conditions.
- Journeys: A journey runs continuously. Any new contact that meets its trigger conditions will automatically enter for marketing automation. Ideal for responding to new behaviors or profile updates over time.
We will focus on campaigns in this guide to send a simple "Hello World" email to all your contacts.
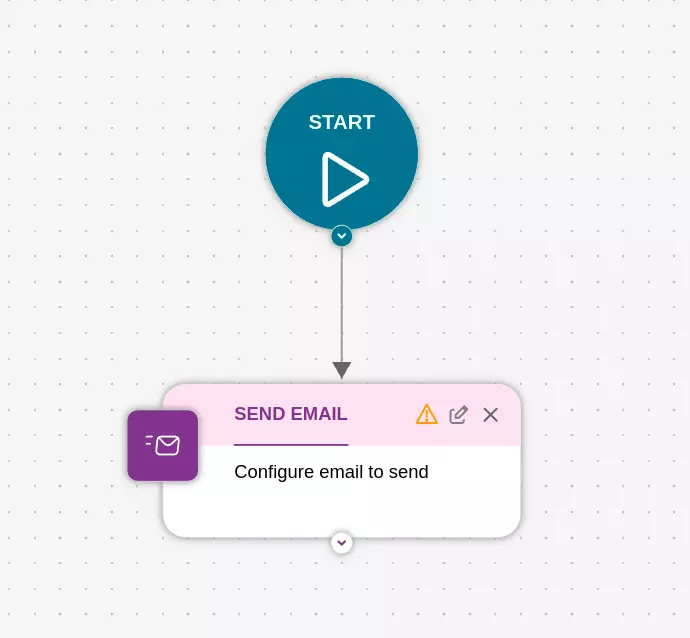
Navigate to the Campaigns page at Marketing > Campaigns. Click Create Campaign.
By default, Target All Contacts is selected. Click Continue to proceed to the Sequences view.
The Sequences view has a library of automation components that you can drag and drop into the sequence editor. For now we will not add any components to the sequence. Click the Edit icon on the existing "SEND EMAIL" component to create the email. Follow the flow to create a simple email.
Step 5 (Optional): Apply AI Personalization
On the right hand side of the Edit Email modal is a Variables panel. This panel allows you to define variables for injecting into the email subject, preview or body.
Follow our AI Personalization guide for detailed instructions on how to apply AI personalization to your email.
There are 2 types of variables:
- Contact variables: You assign/map contact attributes to contact variables. You may define a fallback value in case the mapped contact attribute is empty or not defined.
- AI variables: You provide a prompt to the AI to generate content. You may use contact variables within the prompt to provide the AI with contact specific information so that the AI generated content can be personalized to the contact. This is how you can achieve hyper-personalized email marketing using Spreeflo.
Create AI variables that specifically uses contact variables in the prompt to generate personalized content for each contact. Be specific in the prompt for what you want the AI to generate, including maximum number of words or sentence length.
Tip: By using AI variables, you help achieve greater content diversity across your emails since every AI generated output will often be completely different. This helps improve email deliverability because email providers are less likely to regard your emails as spam for mass emailing.
Every variable is represented by a variable syntax in the form of {{ my_variable }}. Variables are injected into the email subject, preview or body using this syntax.
Step 6: Start Your Campaign
Once you are happy with the email, click Save to save the email.
If you have started your free trial, you can click Start Campaign and this will shortly send the email to all your contacts. DO NOT start the campaign if you do not want your current contacts to receive the email now.

Step 7: Monitor Your Results
Track your campaign performance in the Campaigns page (Marketing > Campaigns) and Marketing Emails page (Marketing > Emails).
You can also review sent emails for every contact in the Master Inbox. By default, the master inbox only filters for emails with replies. To see all sent emails, Clear all filters in Filter Options and click Apply.
Next Steps
Congratulations! You've successfully created your first email campaign. Here's what to explore next:
- Learn about AI personalization features.
- Explore how to automate your campaigns or journeys.
- Check out how our pricing works.
Need Immediate Help? Contact our support team at support@spreeflo.com or check our other guides for more information.